Rstudio Server
Getting started with Rstudio in the cloud ☁️💻
RStudio Server enables you to provide a browser based interface to a version of R running on a remote Linux server. This allows you to work on complexe datasets/models without the worries of your computers own ressources.
Using Rstudio in the cloud also allows you to save your work in a safe environment without the worries of your laptop battery dying or your hard drive crashing.
Using Rstudio Server combined with git is a powerful way to streamline your work and test compute intensive methods before deplying to a High Performance Computing service such as Compute Canada
Getting started
To get started, kindly email Eric so that an account can be started for you.
Usernames & Passwords are CASE SENSITIVE
Signing in
Head over to : http://10.203.131.88:8888/ and log in with your personal details.
Uploading your scripts
There are 2 ways of getting code and data on the server. For your code I recommend setting up GitHub and pulling your project (see below).
OR
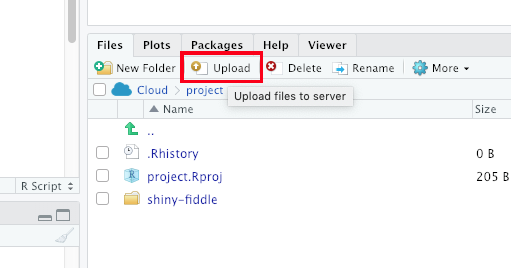
Alternatively, you can zip your scripts and data (within a single zip file) and use the upload function found in the Files/Plots/Packages/Help/Viewer section.
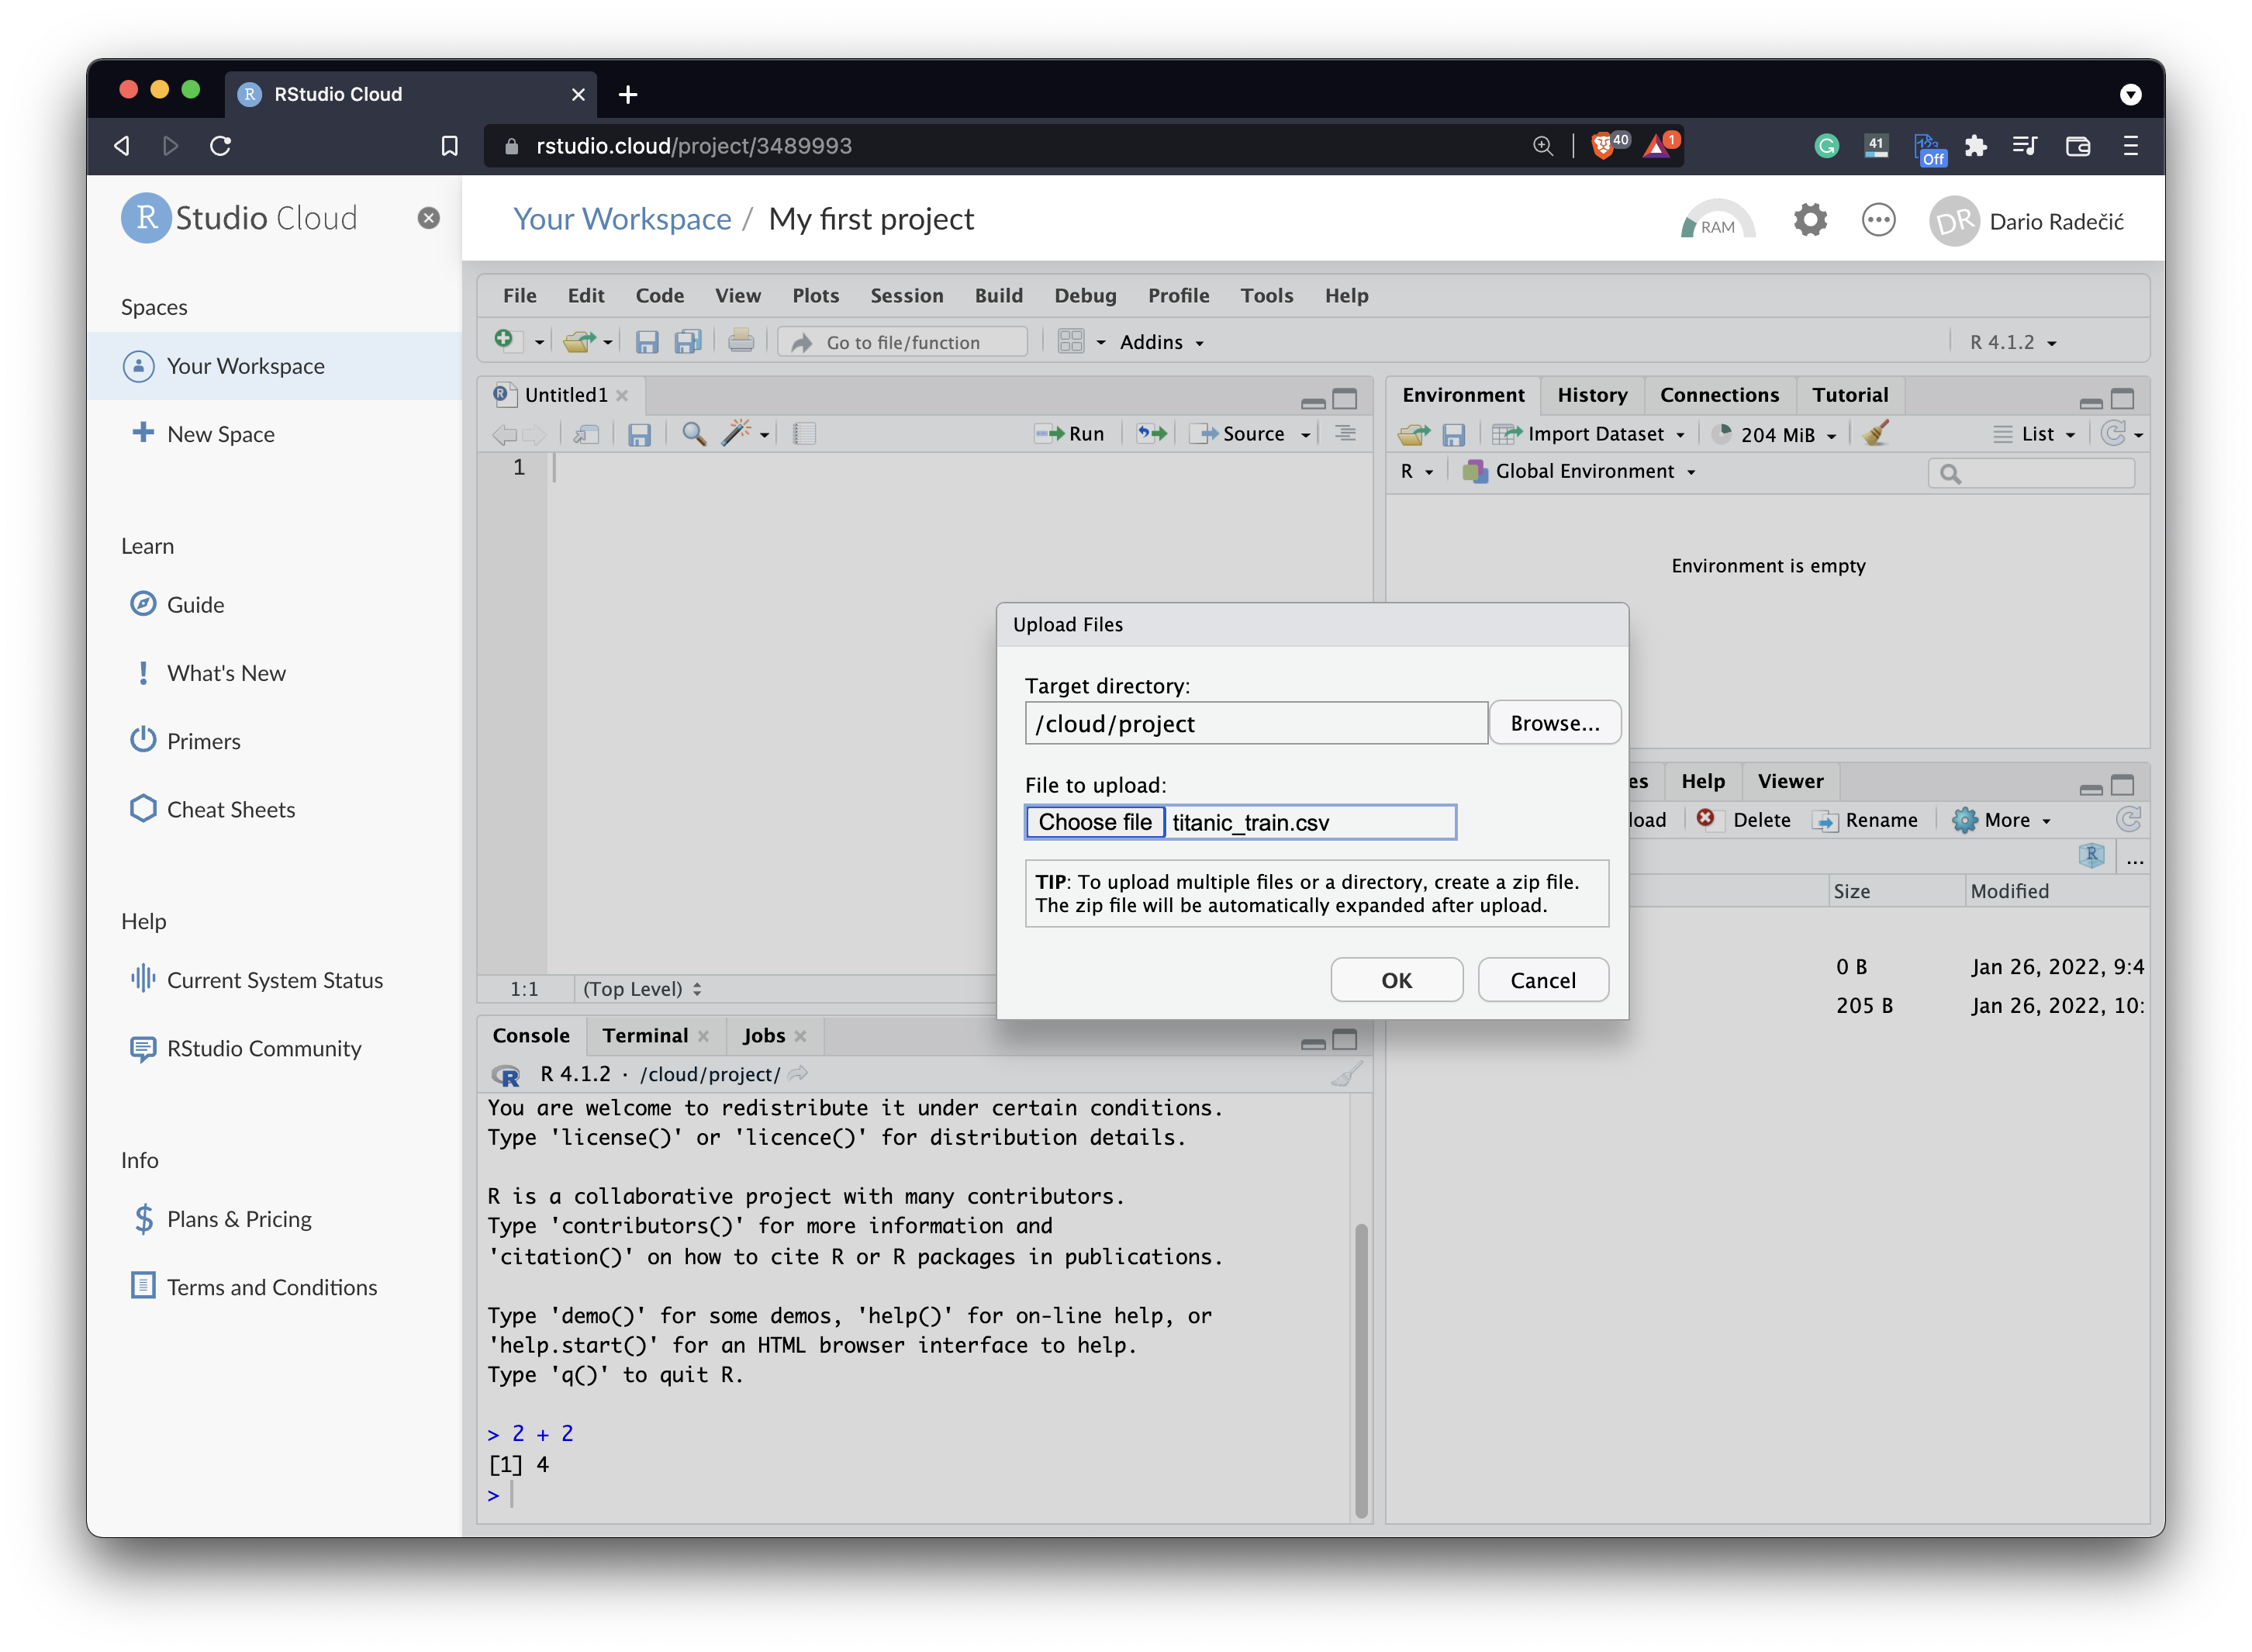
 Then select the directory where you want your files to be transferred to and the files will be uploaded and automatically extracted into the selected directory after clicking the “OK” prompt.
Using resources
The server has a certain number of cores reserved for Rstudio instances. However, the memory is shared with all the users. Please be careful when running memory-intensive scripts.
Currently, the server has : 10 CPU Cores 64gb of memory
Setting up a user (Admins only)
- Log in to the server locally or via SSH
- Run the following code:
#### 1. Get Rstudio Docker ID ####
sudo docker ps -a

#### 2. Open Container interactive shell ####
docker exec -it CONTAINER_ID /bin/bash

#### 3. Set new user login id ####
my_user=new_user

#### 4. Add the user ####
useradd ${my_user}

#### 5. Set the user password ####
passwd ${my_user}

#### 6. Create a home directory for the new user ####

mkdir /home/${my_user}
chown ${my_user}:${my_user} /home/${my_user}


#### 7. Close the shell ####
exit